#07 - Pewter City Gym
I'd like to preface this post by saying: Ignore the time gap. I wrote this nearly a month ago, actually converting posts to website is actually the hardest part, just. Don't make a big deal of it. I'm not going to go too hard editing the text to make it make sense, just pretend I actually uploaded this when I finished writing it so it makes sense.
I went from writing one post over the course of two and a half days, to now starting on a third post within 24 hours. I think for readability I've figured out a good length for posts to be, but do let me know if you feel differently.
Last time on Radical Red Hardcore Monotype, we defeated the stupid idiot moron bug catcher kid, and we're now allowed to leave Viridian Forest!


Finally, we're about to get out of here.
And from the other side of Route 2, we find Diglett's Cave, and a whole host of new Ground types to play with! So many I accidentally ran out of Pokeballs to catch them, I had to go and get more! We also get the TM for Thief, which is cool.


Look at all our new friends! Some will get more play than others, like before, but it's always good to have more options. I feel like having a slideshow of all these new friends would be tedious to see, so I'll just bring them up as they see use. But I'll mention a few now:
- Mole the Diglett and Angela the Alolan Diglett are going to be fantastic, with good base speed stats that'll become even better after evolving (after the first gym). Mole has 5 base points highest speed and Arena Trap, while Angela has Steel typing. These two are going to be very valuable to the run!
- Matilda the Trapinch boasts a comically high physical stat for this stage of the game, and access to Rock Slide- Rock Slide!
We also have the opportunity to buy an Egg from the old man in Pewter City, but I'm honestly not sure what I'm going to do with those since they can give access to mons earlier than you're normally able to in progression. I still have to determine whether I'll allow that or not, and whether I'll allow myself to save scum into whatever I'm looking for.
So what's next? Well, this guy is next.

Radical Red does this cool thing where the Johto gym leaders make appearances as bosses (sometimes optional) in RR. Falkner here is the first of them. The Flying type specialist is quite strong after for this early in the game, and in my first run this was the first battle I actually failed the first time through. But this time I'm being much more methodical.
That said, if I may take a minute to soapbox: as a Monotype enjoyer, I'm dissappointed by how often this mod seems to disown the idea of these gym leaders being specialists. You'll see in just a moment here, not every member of his team is actually a Flying type. I will say- the exception is a bird, which does make sense, but I'm still disappointed. You'll see later on that some of the trainers who *do* stick to their monotype can be just as challenging (if not sometimes more challenging) than their peers who abandon the concept. If - by some random chance - a mod creator is reading this, *please don't abandon the idea of monotype gyms.* It takes a bit more creativity, but at all stages of the game you can create engaging and difficult enemy teams without breaking your Monotype.
Anyways, soapbox Modesty stands down so we can continue our challenge.
So, let's take a look at his team:

A frightening lineup, but we have new pals to work with. Let's see here...
- Trumbeak, Squawkabilly and Farfetch'd-Galar are all physical attackers.
- Yanma and Wattrel are special attackers.
- This whole team is pretty fast, the slowest being Wattrel with a speed stat of 32.
- As a team of (mostly) Flying types, my most reliable STAB damage won't be an options, so I'll need to rely on coverage where I can.
- Yanma and Trumbeak both have Grass coverage, but no Ice or Water damage in sight.
My first instinct is that Shoal is a good candidate to counter Trumbeak.

Yikes, maybe not.
What I did figure out though is that Angela the Alolan Diglett has such a high base speed, it outspeeds Falkner's whole team (except after Yanmega gets a Speed Boost) even without a speed boosting nature. That means it can go all in on attack. Even in the event it doesn't outspeed, even the lowest number of Rock Blast hits has a 93.8% chance to KO.

And Angela can switch in on Yanma if need be, so I'm calling that my Yanma counter. One down, 4 left.
Sasha the Geodude can switch in against a full health Squawkabilly no problem, and hit back with a Rock Tomb that deals massive damage to it. That does raise the problem of Reversal suddenly becoming very powerful, enough to then take out Sasha. But an Ice Shard can then seal the deal. Sasha as my for-now Squawkabilly counter, as long as an Ice Shard user makes it onto the team.
For Trumbeak, Lady has the ability to withstand up to 4 Bullet Seeds while hitting back with Sucker Punch. It's not likely to end with Lady as the victor, but it should for sure put Trumbeak in range of an Ice Shard finish. Another case of a conditional Ice Shard user, so I'm going to nominate Erosion right now as our best Ice Shard user. Erosion will likely be switching in and out frequently to avoid getting eliminated prematurely, so I'll need to make sure my non-leads can all switch in comfortably on their targets. Now it's down to Wattrel and Farfetch'd-Galar. Farfetch'd-Galar has a scary Brutal Swing, but Shoal might be tanky enough to fight back. If I am able to get a neutral-switch in, I have at least 2 turns to land a Will-O-Wisp that will allow Shoal to comfortably stomach everything it can throw, including that Brutal Swing. Finally, for Wattrel, I'm deploying Matilda the Trapinch. Access to Rock Slide makes up for having less than stellar defenses against Wattrel. But with an Oran Berry, Matilda can withstand 2 Air Slashes, giving it an opportunity to switch in and hit a guarunteed OHKO with Rock Slide. The only issue, is that Matilda might flinch on the crucial turn, and I don't really have a way around that. But with each other enemy accounted for, this gives us our final team for Falkner:

- Lady wears Trumbeak down to Ice Shard range.
- Matilda switches into Wattrel and threatens it with an OHKO Rock Slide.
- Angela is faster than Yanma before the speed boost and Rock Blast deals hefty damage.
- Sasha can hit a powerful Rock Tomb that brings Squawkabilly to Ice Shard range.
- Shoal can Will-O-Wisp and neuter Farfetch'd-Galar into submission.
- Erosion is our dedicated Ice Shard user and can handle cleanup.
Sounds like a plan to me, let's rock and tumble! I mean rough and roll!

is it just me or is he- why is he down there?
The battle begins! First thing's first, Sucker Punch.


A phenomenal start! Crit on Sucker Punch actually puts us ahead in damage, and Flame Charge doesn't do as much damage to Lady. There's a chance Trumbeak retreats for now, but we don't play the prediction game that casually. We throw another Sucker Punch, and if the switch happens, we're still in an advantageous position.


I... forgot to take the Oran Berry off Lady. That's actually pretty bad, I was supposed to remember to do that so Trumbeak couldn't heal with Pluck. Well, I guess this sorta resets my situation, doesn't it? I can continue spamming Sucker Punch.


Ouch- but this is ok. Trumbeak is already in Ice Shard range, so Lady has done her job. Everything past this is icing on the cake. She's going to go down swinging Sucker Punch: either she takes Trumbeak with her, or gets the chance to give another mon trouble.

Seems like the first option, and our first target is down. Excellent work, Lady.

Squawkabilly comes in next, this actually isn't ideal for us because any damage we do now puts Sasha at risk for going down to Reversal before she can hit Rock Tomb.

However! According to calculations, the amount of damage it would take to put Sasha into OHKO range is far more than Sucker Punch would reasonably deal. Lady, if you please~


Alright Mr. Overkill, she was at 3 hp, chill. But this is all still fine and good. In comes Sasha.

Now we launch Rock Tomb. With that damage already on it, this will likely take Squawkabilly out.


I'll take that trade, that's a good trade! Down goes Squawkabilly, and already we have a nice comfortable advantage. Farfetch'd-Galar comes in, and I'm inclined to make use of our 1 mon lead to press our advantage. For this, I'm going to launch Magnitude. Farfetch'd will probably move first and hit a lethal Rock Smash (Sasha is a rock, after all) but if she survives the Magnitude will put in a good chunk of damage on the way out.


Excellent work, Sasha! If Farfetch'd-Galar Roosts, Magnitude will likely be able to keep it in a Roost loop, and if it gets the knockout on Sasha we still have an excellent opening for Shoal to take over. In fact, it might even be faster for Shoal to go on the direct offensive rather than going for Will-O-Wisp. It just depends on what happens next.

Ah, it is to be expected. Still, remarkable job from Sasha. My mons are doing me proud today!

Alright, Shoal, just like we practiced.

Actually, according to the math, going directly to Ominous Wind is the play here. Shoal can survive plenty long enough to get the knockout without needing to Will-O-Wisp to survive, and it might even take out the rest of Farfetch'd-Galar's health in one shot.

...Alright, that one is on me, I forgot it could do that.

But Shoal isn't letting me down. This time I will Will-O-Wisp, because I suspect the enemy is going to Roost again. Enemy AI with Roost tend to favor it heavily when below half health, I've found. But with a burn, this 1v1 can take its sweet time and we'll be the ones left standing.


Oof, I was hoping that wouldn't happen. Not to worry though, we're still in a good position. Just try it again.


There we go, not so bad! We can even spam Absorb to offset some of our health loss. We won't net gain on health, but it'll prolong our advantage some more.


...maybe I misread the calculator, was it always that minimal of damage/healing? Yeah, I think I'm just going to go Ominous Wind instead.

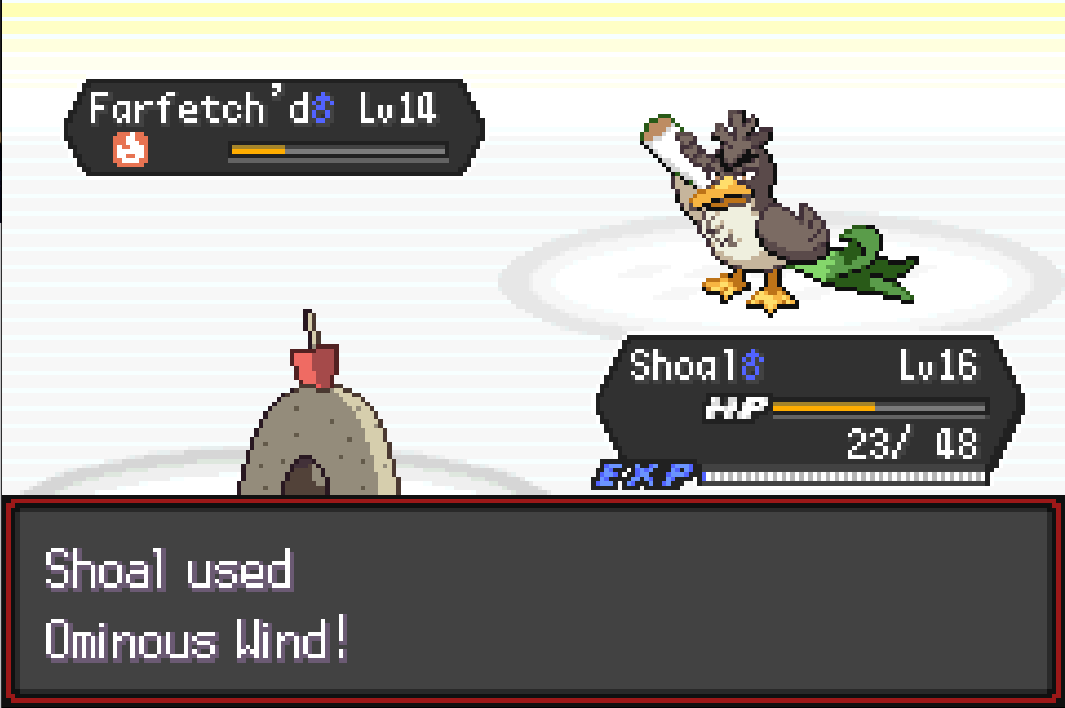
That's better. We'll keep that up and Farfetch'd-Galar will be well behind us.


So- yes, Roost is out-healing Ominous Wind, but this isn't something it can keep up forever. And if things do draw out too long and Shoal goes down, we have Erosion in the back pocket to guarantee a priority finisher.


Waitaminute, speed drops! Enough speed drops from Mud Shot, and I'll be able to make my attack before he can Roost again! I should've thought of that earlier before spending *that many turns clicking Ominous Wind*. Oh well, we live and we learn.


Not slow enough yet? That's fine, I can keep going.


Still not slow enough? Alright, maybe at -3 I'll outspeed.

Yeah I suppose that makes sense. Alright, who's up next?

Oh! We can work with this. Now- I did fail to consider that Angela switching in on Yanma would be forced to take 2 attacks before attacking, but that can be offset by letting Shoal go down to Yanma to give Angela free entry. Then Angela can take one hit, then strike back with force that- it's overwhelmingly likely to be lethal, let's be real. Yanma does have Lum Berry, so Will-O-Wisp won't take on the first hit, but Shoal is just trying to give Angela an opening.


Alright, that was fun! Anyhow, Shoal is ready to take his leave.

Bye Shoal! You did a great job!
Angela, it's your turn. You just need to take one hit, and Rock Blast should do the rest.


There we go! Nice job!
Now Wattrel comes in. Again, we have a mon advantage here, so we can play more aggressively here. And Angela actually outspeeds here, so there's a chance for Angela to sweep the rest of the game if the rng on Magnitude and Rock Blast are good. Let's see what happens:


I'll take it, I'll take it. 3 hits on Rock Blast and Wattrel consumes the Berry Juice, and still some damage left over for the road. Matilda takes the field to launch the lethal Rock Slide:


Like clockwork. That just leaves Farfetch'd-Galar, and now it's time to see how well my strategy was laid. Farfetch'd will outspeed and Roost here, but if I spam Bulldoze, Matilda's raw base 100 attack stat should put in some real work here.


And with that, we claim victory!

Falkner is gracious in defeat, giving us the Roost TM for ourselves.

We can't use it right now, but it'll be a valuable option for one of our later projected superstars.
And now, next in our order, we face our first gym leader! The first actual widely-accepted marker indicating progress through a Pokemon game! Exciting!
And we actually have a bit of an advantage in this one. See, Brock's hardcore gym features a permanent Sandstorm effect. Now, my only Sand Rush mon at this stage would be Sandshrew, and that's its hidden ability, and I'm not going to farm for a hidden ability (later in the game I'll get items that allow me to access hidden abilities, I'll be sticking to those). What I *do* have access to right now is Sand Veil and Sand Force pokemon.
And of course, not to mention the obvious: my whole team is Ground types, we're already immune to Sandstorm. But this doesn't mean we can get complacent, even if Brock's Rock type pokemon have a disadvantageous matchup against my Ground types in general, the ones he does have are going to be tough to take down. Although to take a brief step onto my soapbox again, only 3 of his 6 pokemon are Rock types. Literally half his team! Why do the devs of this so strongly dislike Monotype teams?
Anyhow, let's take a look at Brock's team:

Here's our competition: a dedicated Sand team with some tricky choices. All 3 Rock types have traits to counter their Ground weakness: Lunatone has Levitate, Lileep has Grass typing, and Archen is a Flying type. Varoom has an Air Balloon which gives some protection against its 4x Ground weakness, Cacnea is a devastating Sand Rush physical sweeper with an Eviolite to make it even harder to take down. Seriously, that Cacnea will be rough. And of course, Hippopotas is a bulky mono-Ground type sand setter- I should know, Hippopotas and Hippowdon were All-Stars of my previous Ground team.
So what recourse do we have?

Well for starters, these three have abilities that synergize with Sandstorm, so we should definitely use that to our advantage. Solid the Silcobra (middle) has Sand Force, boosting Rock/Ground/Steel type moves while Sandstorm is active. Brock's team has many ways to overcome Ground weakness, but there are still a few targets we can hit for strong Ground damage.
It's also worth noting that Brock's team is generally pretty slow, Cacnea does have an overwhelming Sand Rush speed stat of 40, but among the others there's a sharp drop-off in speed stats. Angela outruns all of them, and has STAB Metal Claw for super effective damage against all the Rock types (but is threatened by their Ground coverage). Angela will likely be very strong in this fight. Right now I don't have calculator access (I really need to figure out if I can download a working version or something this is getting annoying) so I can't check specific predictions, but we can still assign some general counters.
Mantle the Numel can strike Cacnea with strong Fire damage, although given Cacnea's Eviolite boosting its defenses Mantle might not be able to take it out fast enough. What it can do is use Ember to potentially inflict Burn, which would cut Cacnea's damage output in half. The biggest problem is that Mantle doesn't have fantastic defensive stats, so it might get barely any chance to even try for the Ember burn. It could be something. Another thing it could be is a Lileep answer with its Fire coverage and neutrality to Mega Drain, but probably not becuase I can't imagine it survives Hidden Power Rock. Another thing Mantle could do is check Varoom, it could burst the Air Balloon with super-effective Flame Burst, then finish the job with 4x effective Magnitude. It'll be pretty hurt by Bulldoze (I assume), but it's certainly an option. But this all feels a little shaky, let's see if we can find a more stable counter somewhere else.
Jimothy being part Water type gives it some use against this team, although Cacnea and Lileep both pose a big problem with their Grass coverage. Cacnea also resists Water and has Eviolite bulk, while Lileep's Storm Drain renders it immune to Water damage. Storm Drain is an ability we'll become very well acquainted with later when we get access to - and I'm not joking here - my favorite pokemon in the entire franchise: Gastrodon. It's such a specific choice but these monotype runs are what made me fall in love with Gastrodon, and Storm Drain is a not-insignificant reason why.
It's also at this point that I only just remembered to bring up another aspect of Sandstorm that'll impact this battle: Rock type synergy. Aside from the immunity from the Sandstorm chip damage that happens each turn, Rock types also get their special defense boosted by 50% when Sandstorm is active. That means we'll want to target the physical side when there's no overwhelmingly obvious low special defense in our way. It's a cool piece of design since Rock types usually have very strong physical defense, so boosting special defense is a great synergy play.
*Anyways*, back on topic: let's start with Hippopotas. Special damage is going to be the way to go here, with it not receiving the special defense buff and it having lower special defense than physical. It's super slow so I can trade speed for sheer damage. So what does that leave me with? My choice is Jimothy. Brine is special Water damage that doubles in power if the target is at less than half, ensuring the Hippo doesn't get the chance to Slack Off stall after Toxic comes out. Jimothy is also faster with a speed stat of 25. The thing is- I think Jimothy being our lead will likely cause Brock to switch out to Cacnea or Lileep afterwards, which is pretty bad for us. Right now I'm not confident enough in my switch-prediction skills to try and make a predictive choice myself, but I'll want to build my team with that possibility in mind.
My choice for Cacnea is probably going to be Lady, Cacnea's coverage moves should all either be resisted/immune or neutral against Lady, and her high physical defense stat should buy some good time. I expect to take quite a few Pin Missiles, so I'll make sure she has an Oran Berry to heal up. And of course, she can strike back with super effective Struggle Bug.
I must admit, I really underestimated this little pizza slice, Lady has been great in my early game
Lunatone is next and this is a tricky one, Lunatone has Levitate to nullify our Ground moves and has our first instance of Ice coverage. From my previous experience with Ground monotype runs, Ice is the hardest weakness to cover for, in my opinion. Water is easy with the number of immunities you can have, and Grass can be tough but some of your best defensive options on both physical and special sides can handle Grass like champions. Ice, however, is the weakness that tends to hurt your bulkiest mons *really* bad. Lunatone also has rather strong special damage all around, and a respectable 85 base special defense being augmented by the 50% boost from being a Rock type in Sandstorm. We're going to need to find something that can deal good physical damage here without being overwhelmed by Lunatone's special coverage.
Taking a side-note here, I did notice clever little trick I could try here.


This is Ruin the Yamask, and she has some fun tricks she can pull. Wandering Soul allows her to steal an ability from an enemy by making contact, and that also removes that ability from the enemy. Varoom has the ability Filter, which reduces super-effective damage dealt to it by a multiplier that makes getting hit for weakness not so bad. But if Ruin uses Shadow Sneak (with priority to guarantee it hits first), not only will it pop Varoom's Air Balloon (making it vulnerable to its 3x* Ground weakness), it'll also remove Varoom's ability that makes it a 3x weakness instead of a 4x.
Does that make sense?
Actually, there might be an even better use for Ruin in this team. Shadow Sneak will deal super effective damage to the Psychic type Lunatone, and that contact will steal Lunatone's Levitate, making it weak to Ground damage. I think that's enough for Ruin to make it onto the team, even if her specific usage isn't necessarily nailed down.
I'm also going to take this moment to add Angela to our team, her tremendous speed stat and Steel STAB will be very valuable for this fight.
So, Varoom and Lunatone are vaguely accounted for, now there's Lileep and Archen to deal with. Erosion's Ice Shard would be temping here, but Ice cancels out Ground's Rock resistance, making Erosion extra vulnerable. And the Ice Shard isn't going to deal quite enough damage to justify usage here.
What I do think I want to do is put Solid the Silicobra down as my Archen counter. Bulldoze won't work on the Flying type Archen, but Rock Tomb will be neutral. Moreso, it's boosted by Sand Force. Combine that with the fact Archen can only really hit Silicobra for neutral or worse, and Glare provides useful Paralysis that can hit Ground types. I wouldn't call it foolproof, but it's useful enough to be part of my team. Finally, I'd like to find something to answer Lileep. Honestly this one is hard to counter, Storm Drain isn't so much the issue as it having such a tanky moveset, Grass/Rock typing means I don't have an easy way through and my counters are limited. Out of all the remaining mons I have, I don't really like any of my options here. What I might need to do is move around some of my answers. Here's what I mean:

Right now I have my team organized in my box in spots corresponding to who I expect each mon to answer. Right now, Lileep is the last open spot. But none of my remaining mons have a great answer for Lileep, and I've noticed that Angela should actually answer Lileep *very* well. STAB Metal Claw should output good damage, and Steel typing leaves Mega Drain neutral. So I'm going to move Angela over to that spot to make her my Lileep answer. Now Lunatone is the space left behind, but I already have a mon that can pull something against Lunatone: Ruin. So Ruin moves over to that spot. And now my last opening is against Varoom, and *I have plenty of answers for that*. My choice here is going to be Donna, priority Ice Shard is a good helpful tool to have, and a strong Magnitude can certainly put down Varoom once Air Balloon is popped.

With that, my Brock team is ready for my first attempt. The strategies aren't as cut and dry as they have been up to this point, but I have answers and options for everything he has. I'll just be a matter of stringing them together to make it work.

Let's roll.
wait- no he's also down there, why are they so low on the screen-


Already Brine hits *really* hard, forcing Hippopotas down to Berry Juice. We get hit with Bulldoze in return, which lowers our speed. Now, we're in a *very* risky position right now, because the enemy has seen me use a Water type move. There's a non-zero chance Brock switches Lileep in and sucks up Brine with Storm Drain, making Lileep even stronger and putting everything I have in jeopardy. I could try to anticipate this by using a different move, but that risks a slower KO on Hippopotas, which invites the chance for more bad things to happen. Right now I feel like the safest play is to click Bulldoze, because I frankly don't trust that the AI won't somehow know to switch in on Brine.


The Hippo takes a break, and I hit a Bulldoze to lower the speed back to effectively where it was before. It's so incredibly tempting to click Brine here, but I'm terrified of getting hit with a Lileep switch. It's not huge damage, but I'm going to keep clicking Bulldoze. It's not like Hippopotas is doing that much damage to me anyways.


What did I tell you? I feel so vindicated, of course this was going to happen. And now I get to tack on an extra speed drop and some damage onto Lileep before Angela switches in.


Angela enters, and Sand Veil procs to make Mega Drain miss! That was very lucky, we can't build strategies around evasion chances but we can certainly take advantage of them when they happen. Now we strike with Metal Claw, for sure we outspeed here.


Metal Claw does not as much damage as I was hoping, but not too bad. Lileep uses Recover and eats the Oran Berry to go back to being in a good spot. If we hit the attack raise on Metal Claw we might be able to lock Lileep into a Recover loop.


Now we hit the Stockpile strats, which is where Lileep gets real tanky. Luckily, he can't really do that much to me either right now, and if I hit an attack raise (or a crit for that matter) it'll negate all that defensive setup.


Still no attack raise, and Lileep is at +2 to each defense. At this point it'll be harder to outpace Recover healing like this.


Metal Claw just barely misses the KO, and Mega Drain hits harder than I was expecting. But right now, we're actually in a great place. Right now, Metal Claw *should* take the knockout.

Just like that.

Oh boy, here comes Cacnea. Because Angela's high speed is so valuable I'm tempted to switch to Lady instead of letting Angela go down swinging.


Lady switches into a Power-Up Punch, which deals literally 2 damage. That's good, even if Cacnea is at +1 it still shouldn't be able to do much of anything to Lady.


Alright, a switch to Archen, I can respect that. Struggle Bug deals almost nothing, which is to be expected here. The special attack drop is meaningless here, the issue is that Archen quite effectively hits Lady for effective damage. But both Flying and Rock stab both thud into Angela, who's also fast enough to strike back. Now is my turn to switch.


I'm getting way too lucky right now, this is unreal. So now we're in a *very* good position- we can either Rock Blast to gamble on more damage, or Metal Claw for the reliable STAB option with potential attack raise. I'm going Metal Claw in case the attack raise happens, then Angela might even be able to sweep.


Down, and, out! Angela is doing great this fight. Cacnea returns, now we switch back to Lady.


Another Power-Up Punch thuds into Lady, and we respond with yet another Struggle Bug.


Cacnea leaves again, and Varoom comes in. Conveniently, Struggle Bug pops its Air Balloon, leaving it vulnerable to its 4x Ground weakness. Now, Lady actually doesn't have any Ground moves on her, but Angela does: and if Varoom tries to click Toxic against us, Angela will be immune to it, giving us basically free entry.


There we go, I like that! Angela is doing a fantastic job this fight!
Now we can hit with a (3x because Varoom has Filter) Magnitude to (probably) seal the deal:

Bam, Magnitude 7 is enough! I have a sneaking suspicion Cacnea is on its way back in...

Yep. Same song and dance again. Switch to Lady, who takes a resisted Power-Up Punch, then Cacnea retreats to our next target.


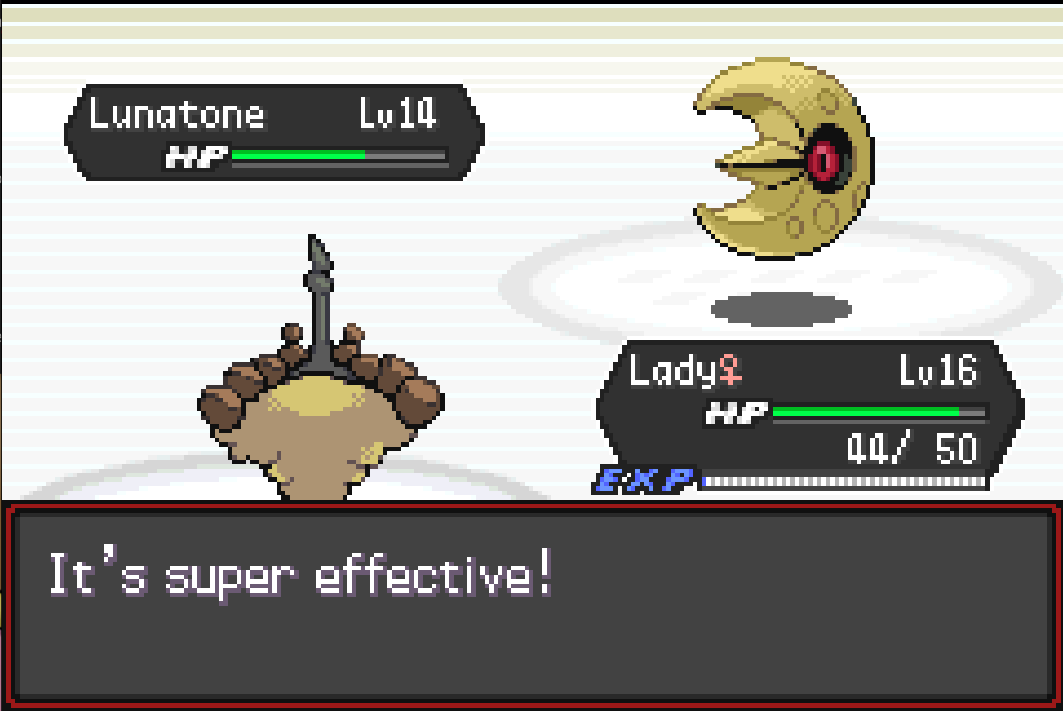
Yep, like last time. Except Lunatone is actually a horrible switch-in, both because of the special attack drop on Struggle Bug, and the fact that Lunatone is weak to bug moves. Still, I need my Cacnea counter intact, so Ruin is up now. That special attack drop should make it even safer for her to switch in.


Icy Wind doesn't deal much, and the speed drop doesn't do much when we're about to respond with a priority move.


I... didn't expect that. Something different is finally happening here. Also, Shadow Sneak didn't cause Wandering Soul to proc the ability switch, maybe it's only when a physical attacker hits you? I thought Ruin was about to get Sand Rush, but I guess not. Because we're still at *all 6 mons* and Brock is down to 3, we actually have a bit of choice here on how we want to do this. Lady's Bug moves are not only strong against Cacnea, but also Lunatone, meaning we can afford to let Ruin go down swinging against Cacnea. I think that's my plan here, hit a priority Shadow Sneak again and then have Lady enter from there.


I didn't expect to survive that, to be honest. Gives us another chance to Shadow Sneak, which is good because it's not dealing that much damage.


Good run, Ruin. Now it's time for Lady to come back.

I honestly wonder if Cacnea is going to switch out again, I'm not sure why Cacnea is so terrified of this pizza slice.


Now that I think of it, I'm guessing that's why. Cacnea goes down, the Sand Rush mon is down! That leaves us up 5-2, and we're in a *great* position.

Lunatone comes in, and we're just going to do another Struggle Bug. We're at such a tremendous advantage right now.


A speed drop from Icy Wind and a special attack drop from Struggle Bug. But I have one last trick up my sleeve here: Sucker Punch.


I never understood this line, I guess it's because it's that thing where a super tough character gets hit hard but they're tougher so it's like "it tickles!" but
I dunno
Anyhow, I'm switching back to Jimothy. With no Lileep around, I can Brine to my heart's content.


I can live with that.

Unfortunately, you can't.

And with that, our run finally reaches the first major landmark: our first gym badge! And along with that is all sorts of new goodies!


Rock Tomb is actually pretty useful for us, Rock is one of the best complimentary coverage types for Ground. But more excitingly: level cap increase! This allows us to evolve some of our mons to new, more powerful forms! (I'm going to do them in bulk and just show you the box).

And here they are! We have 5 new fully evolved mons to play with, and some of our most promising members have arrived!
Angela and Mole now have access to their terrific 110 and 120 base speed respectively, while Quag and Clod have become much stronger walls now that they have an actual HP stat! Edgelord the Sandslash... I'm be honest, not holding out too much hope here, but I'm very willing to be proven wrong.
I'll cut this off here, next time we'll be making our way to the next city, and there will probably be some documented trainers along the way.